Monday 30 April 2012

Twill flat-fronted shorts

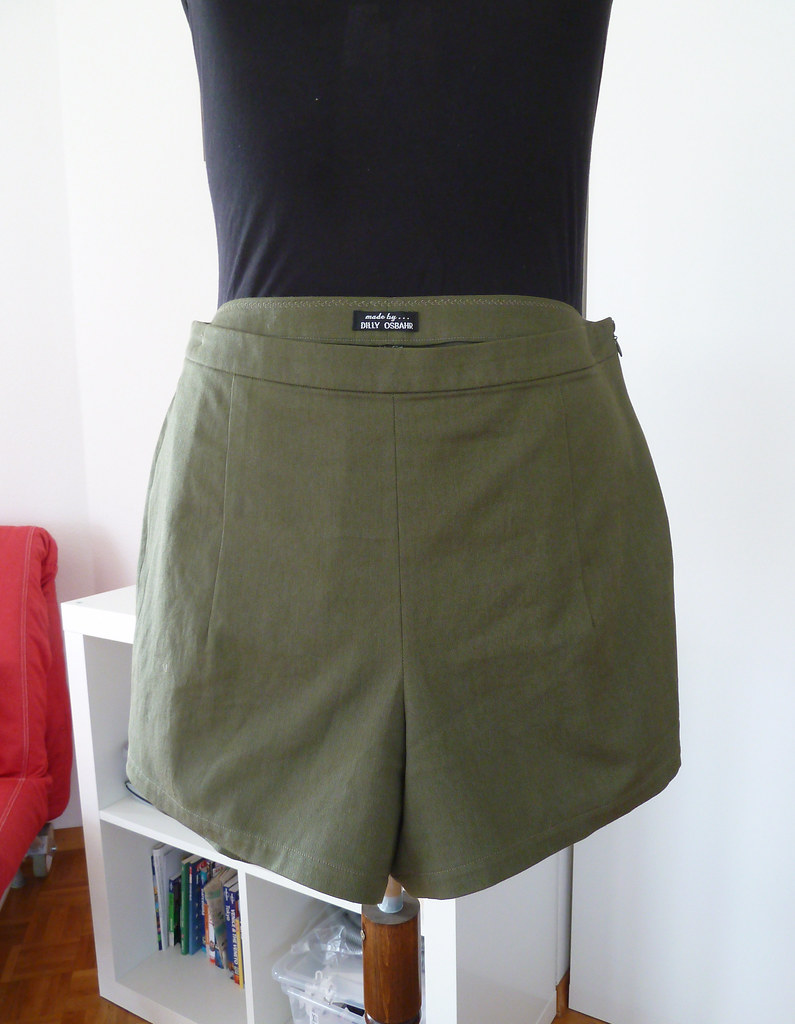
This is the first time I've made any trousers or shorts (these are shorts, just to be clear), as for some reason I've found them to be terribly intimidating. I've discovered that for me, they're actually much easier than fitting a bodice! The review is a bit word heavy I'm afraid, as there's a limit to the photos you can take of shorts on a dress form, and my legs were far too pale to show any pictures of them on me when I made them, and it hasn't been warm enough since to sport them (soon though...)

Pattern description

BurdaStyle magazine 6/2011/111. Shorts with side zip.

Pattern sizing

I cut the 44 as this was the largest size, although I knew I would need to add some width at the hip as I correspond more to Burda size 46. Rather than trying to grade it out, I cut a muslin with large seam allowances

Fabric used

Khaki cotton twill, possibly from Fabric.com, although I can't really remember where this came from.

Did it look like the photo/drawing on the pattern envelope when you were done?

Pretty much - the picture showed shorts, these are shorts...

Were the instructions easy to follow?

Pretty much. Despite never having sewn trousers, I have a fair idea of the order of construction, although I prefer Melissa's way of sewing wherever possible, where the crotch seam is sewn before the side seams, so that fitting over the hips is easier. There was one point where I was glad I read the instructions - I was about to blithely sew the waistband facing to the waistband and then to the shorts, when I realised that because you need to insert an invisible zipper at the side, you need to sew the waistband to the shorts, insert the zip, and then attach the facing.

What did you particularly like or dislike about the pattern?

I like the flat front, I've decided that this style often suits me better than a fly front as it reduces bulk over my tummy, which for me is a slight problem area. However flat-fronted trousers need to fit well to avoid a weird looking crotch, so it's nice to be able to make something that fits properly (or at least better than RTW). I found that the shape of the crotch fitted pretty well for me.

Pattern alterations or any design changes you made

I added length over my bottom by slashing and spreading the back pattern piece at the centre back seam, and ended up changing the scoop of the crotch seam just slightly to allow a little more space under my bottom. I added at the side seams, a fair amount at the hip, and not quite so much at the thigh so that the shorts didn't end up too triangular. I made an adjustment for a full tummy (haha sounds like I've just had dinner) using Sandra Betzina's method (basically slashing vertically through the front darts, spreading the required amount over the tummy, and then redrawing the darts at the original width).

With regards to design changes, I left off the pockets as I rarely use them on trousers, and I wanted a simple version of these to sew for a first try. I was worried that leaving off the back pockets would make my bum look enormous, but its actually fine with these shorts (although I will probably add pockets on the next version). I sewed darts instead of pleats (which I had originally intended to use) as the pleats looked a bit weedy and didn't lie properly in this fabric, I think pleats would be better in a lighter fabric. I sewed the longest length, but didn't do the gathering shown for this length in the magazine.
Construction details

Pretty straightforward, apart from the note above about the order of construction of the waistband. That being said, this is probably the worst zip I've ever put in - I broke two needles and had to resew sections of it twice. As long as no-one looks too hard at the inside it ended up pretty ok though. To pretty it up a bit, and inspired by the hand-embroidered understitching in Threads magazine (issue 157), I decided to do slightly fancy understitching on the waistband facing. This isn't technically an embroidery stitch (I have a pretty basic machine), but it's the prettiest one I had to hand, and I'm very pleased with the effect.

Would you sew it again? Would you recommend it to others?

I plan to sew more versions of these in the near future, using this a bit like a block to draft some different styles. I would definitely recommend this pattern to others - once I'd perfected the fit, the shorts were super-quick to sew.

Conclusion

I'm very very pleased with my first pair of shorts! I like shorts as a summer garment as they provide more coverage than a skirt of equivalent length, but I find it really hard to find RTW shorts that don't disappear up my bumcrack (classy) or gape at the back waist, and are just the right length to be most flattering to me, so it's super to now be able to sew shorts to my exact specifications! I'm definitely going to try sewing up some trousers soon.

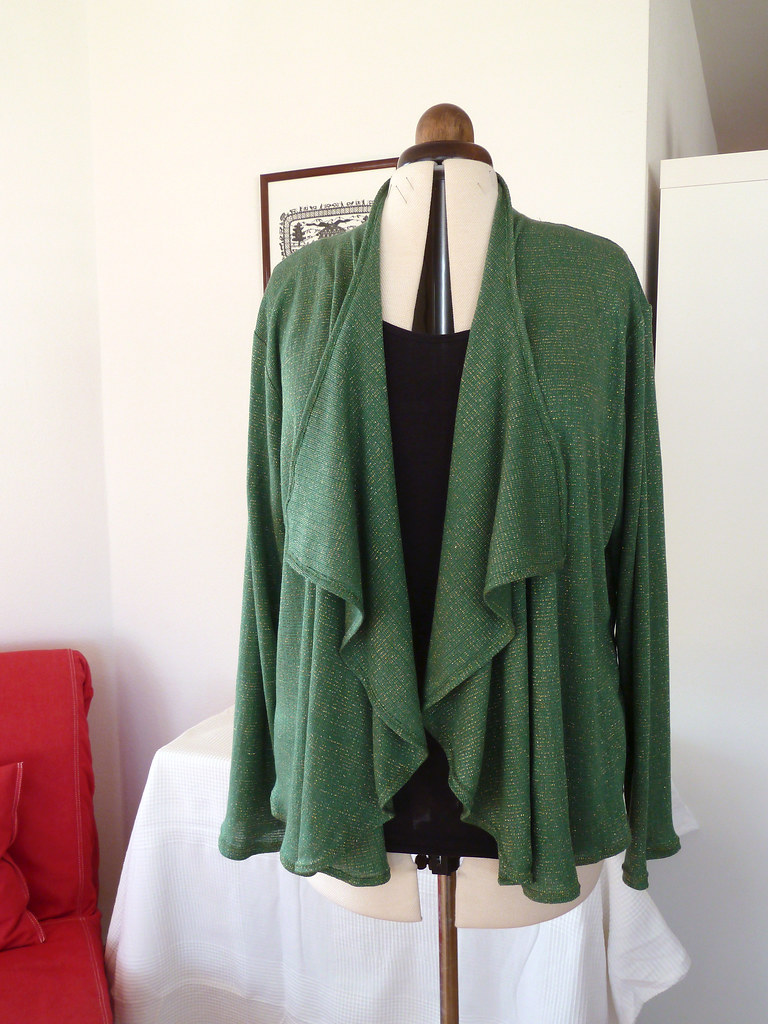
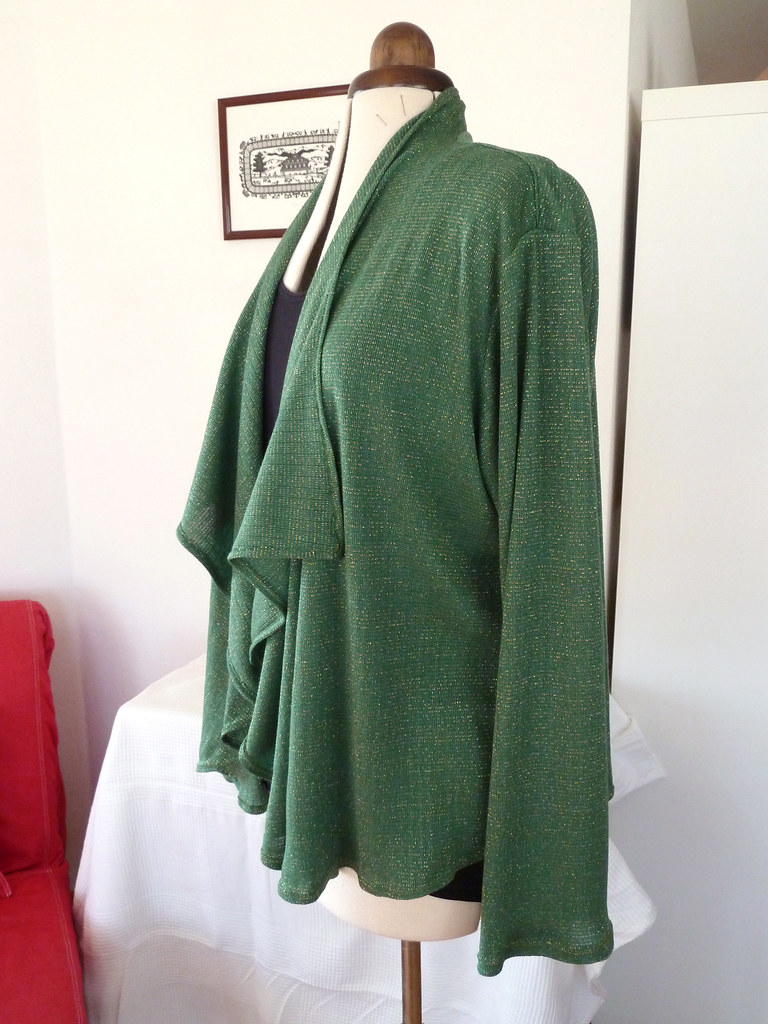
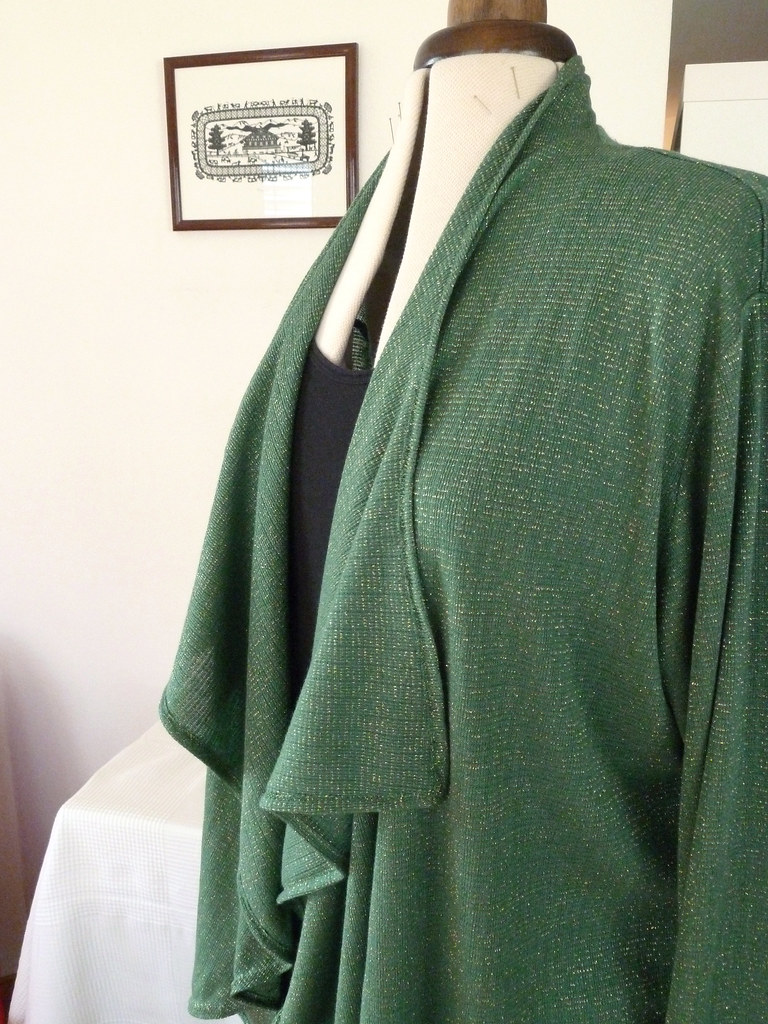
Green and gold drape front cardie

One of my aims has been to sew more separates and mix-and-match type garments, and of course this includes cardies, jumpers, cover-ups etc. I have a few sweater knits in my stash, so I thought I would have a trial run using one of the fabrics I wasn't so keen on.

Pattern description

Self-drafted drape front cardigan.

Fabric used

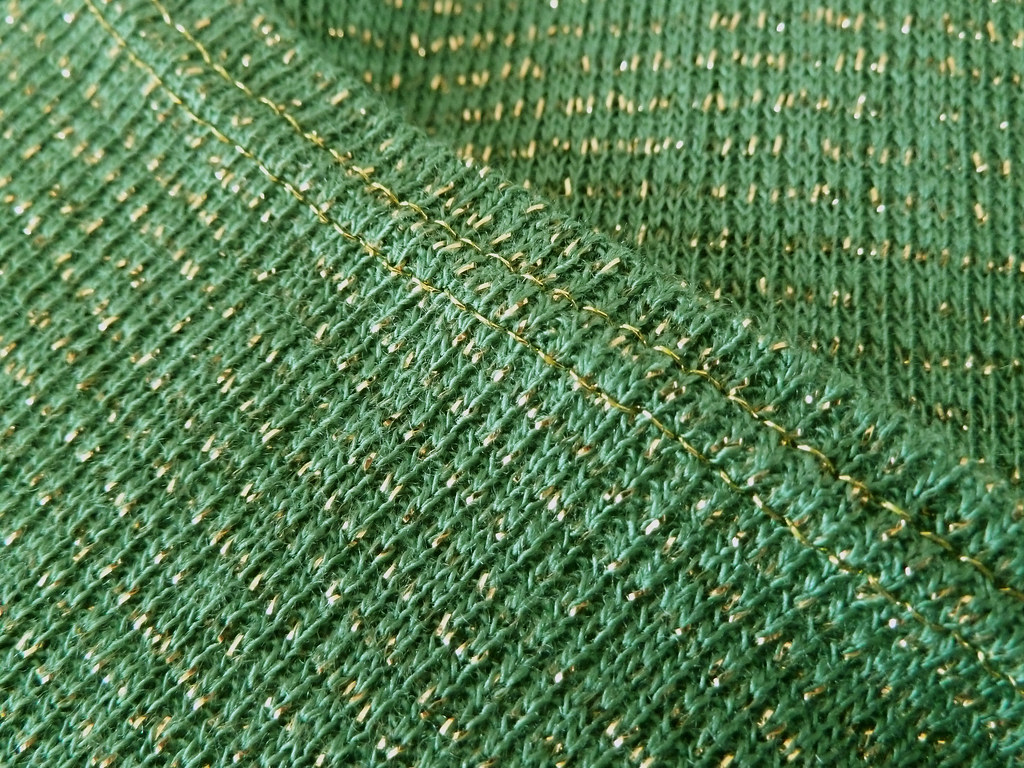
Green and gold sweater knit from Fabric.com, I can't remember the fibre content.

Did it look like the sketch/idea when you were done?

Pretty much.

What did you particularly like or dislike about the pattern?

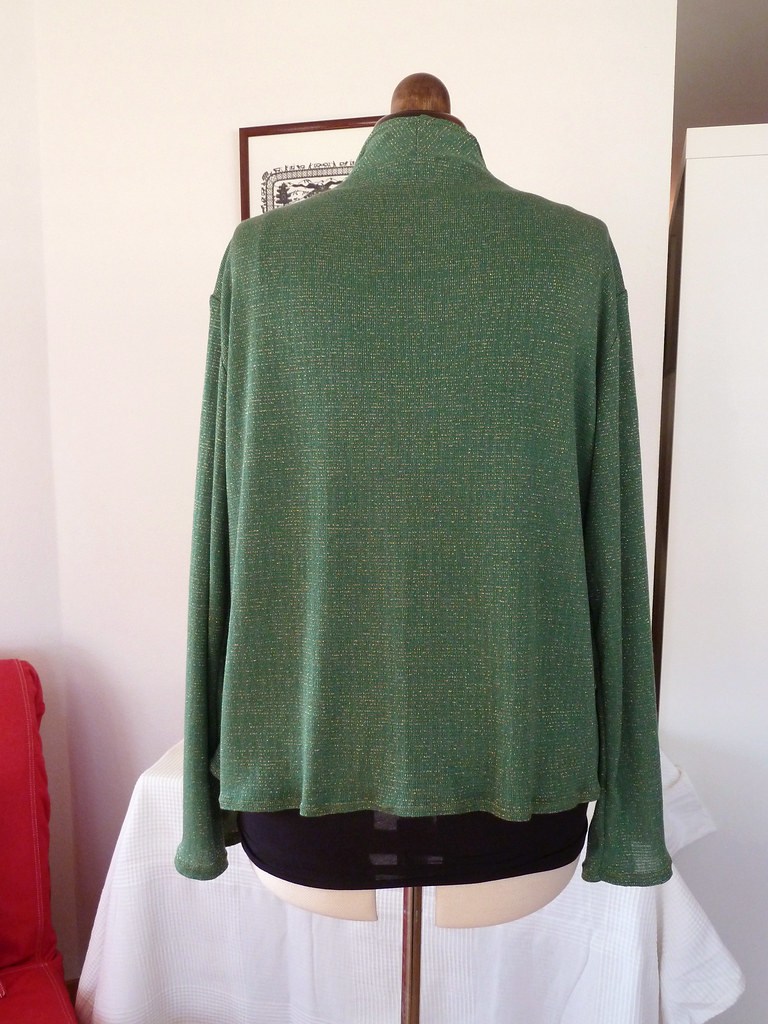
I think I should have used a block with less ease, as this knit is quite lightweight so it's ended up a little large on me. However, I'm pleased with the look of the front drape, and it's extremely quick to make.

Drafting details

The basic block was drafted using the easy fitting jersey block from Aldrich. I then used Lauriana's tutorial on BurdaStyle to modify the block. I used much smaller "wings", and I also kept the side seams in my draft.

Construction details

All the seams were sewn on the serger (with the sleeves inserted flat), then the cuffs and hem (including the neck and drape edges) were sewn with a twin needle with gold thread. The hem along the bottom could probably have done with some stabilising before doing the twin needle stitching as it has stretched a bit, although this isn't too bad here as it sort of adds to the wavy drapey effect (at least that's what I'm telling myself...)

There were a couple of snafus when making this. I snipped into the corners where the collar joins the shoulder seam on the front pieces, thinking this would make it easier to turn this corner accurately. Not a good idea - after sewing, the knit started unravelling, so I had to fix these corners with some handstitching. Next time I will just use the stretch of the fabric to manipulate it round these corners, which shouldn't be too hard as I use a fairly narrow seam allowance when I'm sewing knits on the serger. I also forgot to stabilise the shoulder seams, only remembering when I tried it on and the sleeves drooped off my shoulders. I wasn't going to be unpicking any serged seams, thank you, so I just retrofitted some clear elastic by topstitching along the seam line. Not the most elegant of solutions, but it's ok.

Would you sew it again?

Yes, I plan to, but will modify the pattern slightly, with the first change to reduce some ease in the basic block used (Lauriana does actually suggest using a fairly fitted block, I should have listened!). I also need to adjust the collar as mine wants to sit a bit flat when wearing it, pushing the shoulder point and armscye off the top of my shoulders (even with the clear elastic stabilising the shoulder seams). I think part of this might be due to the lightweight knit used, but I think maybe there's a slight drafting problem too, I just need to work out what it is! Actually stabilising the back neckline might be a good idea too. The final modification will be to think about the hem finishes a bit more - for most of the front drape, the wrong side of the front sections shows, so the effect of the twin needle stitching is rather lost.

Conclusion

A simple draft, and a very quick make, producing a handy and interesting garment. I'm definitely going to make some more of these with a few variations in details.

Sunday 22 April 2012

Me-Made-May '12 sign-up

Me-Made-May '12

Yep, I've decided to do this again - I participated in MMJ-11 and SSS-11. The first I enjoyed immensely, the second wasn't so successful, so I'm hoping that I will be happier with what I do with the challenge this time round. So here's the pledge, some more thoughts about the challenge afterwards:

I, Dilly, of Dibulous, sign up as a participant of Me-Made-May '12. I endeavour to wear a minimum of one me-made or me-refashioned garment or accessory each day for the duration of May 2012. In addition, I will endeavour to make/refashion three more "separates" garments to give my me-made wardrobe more versatility.

So, part of my challenge is going to be trying to expand my wardrobe - whilst it's much more fun to be sewing fabulous dresses, it's not terribly practical when trying to integrate items I've made into everyday wear... I'm hoping that the more everyday stuff will also be a bit quicker to make - my plan is to try and get a few "basic" patterns that I can then adapt as I wish - I'm already making progress on a fitted T-shirt pattern (more on that in another post), I have made a basic shorts pattern (again, more in another post).

There's another important part of the challenge to myself (although I'm not putting it in the actual pledge) - if I don't keep to the goal for whatever reason, I'm not going to beat myself up about it. If there's a day when my me-made items are just wrong (I think we all have those days whether the clothes are me-made or RTW...), I'm not going to get upset, but will instead reflect on why they feel wrong, whether I need to make garments to fill in these gaps, what fitting issues I need to improve etc. I think this will really help to improve my sewing both technically and for wardrobe planning.